
The holidays are here, and your dog is… well, over there… and moving fast! You’d love for your dog to hold their position for the perfect Christmas photo, or to simply not jump on Gramma when she comes through the door. Teaching a solid stay can be fun and quick! Let’s get started…but first a pro tip:
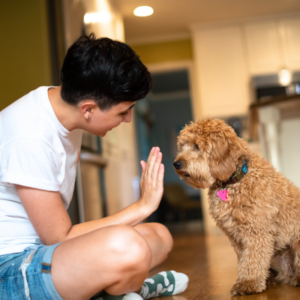
Even puppies can hold a STAY if you keep close and give frequent treats!
Don’t Go Anywhere! When teaching STAY, most people want to step away from their dog immediately, but teaching the dog to hold their position for a period of time before you step away will build the strongest STAY.
Now that you’re ready to stay put, let’s teach your dog how to!
1. Get the Behavior: Bring some high-value food, such as small bits of cheese or chicken. Your first goal is to teach your dog that holding their position is a great idea. So, lure or cue your dog into the position – SIT or DOWN for example. Now start feeding a steady stream of 10 to 20 tiny treats, as quickly as the dog can eat them.
- If your dog is in a SIT, bring the treat all the way to their snoot, so they don’t get up to eat it.
- If your dog is in a DOWN, place the treat on the floor between their paws, right where their nose naturally touches the ground.
Giving your dog the rewards when they are exactly where they should be helps them learn this position really “pays off!.” Then it will be easy for them to learn to hold the position for longer periods of time. Time is your first goal – remember to stay right next to your dog at first!
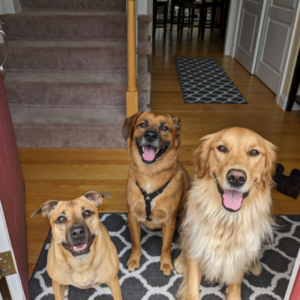
Multiple dogs? Work with them individually before bringing them together to practice. Add a leash to prevent bolting.
2. Dog Relaxes: As you feed the initial stream of treats, watch for signs your dog is relaxing into the position.
- In a SIT, they may rock back onto their rump a little.
- In a DOWN, they might flip a hip to the side or drop their shoulders a bit.
In either position, they won’t be wiggly or fidgeting between treats. When they begin to settle in, you can start to add a little duration.
We’ll say it again: DON’T MOVE away from your dog. HOW LONG the dog holds position is more important than HOW FAR they are from you right now. 😉
3. Add Duration: Once your dog is settled, wait a little, before giving them a treat. You can still give them treats one at a time, but wait a few seconds between each one. Be random about how long you wait.
- For example, you might wait 1 second, then 3 seconds, then 2 seconds, then 7 seconds, feeding at the end of each pause.
- Steadily increase the average time your dog waits between treats.
After you’ve done 5-7 repetitions of practice with various short lengths of time, use your release cue, so the dog knows they’re free to move. For example, say, “Break” and toss a treat away.
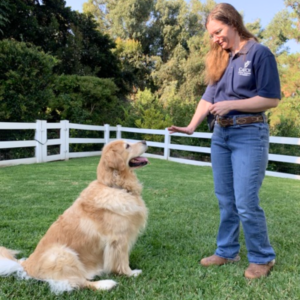
Solid Sit-Stays are a foundation behavior as CATCH Grad Brie Marcotte demonstrates.
4. Add More Duration: Once your dog can hold their position for 10 seconds, change how long your dog has to wait between treats again:
- For example, you might give the dog a treat at 10 seconds, then 17 seconds, then 4 seconds, then 25 seconds, then 12 seconds.
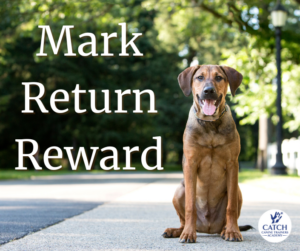
- At the end of the time, MARK, then REWARD.
Your MARK can be a word like “Yep!”, a tongue-click or a hand-held clicker. Keep it unique: only use during training sessions.
These numbers are just a suggestion. The idea is to be unpredictable, which will keep your dog engaged longer than if you try to add one or two seconds between treats in a linear fashion (10 seconds, then 12 seconds, then 14 seconds, etc).
5. Add a Cue: Once your dog has a nice settled position for at least 10 seconds with you standing right next to them, you can begin to pair that behavior with a verbal or hand signal. Say “STAY”, count your seconds silently, then feed your dog.
- The verbal cue, “STAY” begins the time.
- After the dog eats, you can either release them with your release word or start another practice repetition by saying “STAY”.
6. A Step Away. Up til now, you’ve been right next to your dog, but if your plan is to be able to leave them in position, you can begin with just one step away. Say your “stay” cue, take one step and pause. mark that moment, then return to your dog to feed the reward. As you practice this, you can add a few more steps away, or make your pause a bit longer before you mark, return, reward.
A common mistake is to call your dog after a stay, which weakens the stay behavior. Instead, mark, return & reward!
7. Practice: Next, practice in other places, and practice for longer periods of time. To add more distance, lower the time the dog has to remain in position, then quickly return and reward. Keep the training sessions short and fun, and end each session on a positive note, even if your dog didn’t do perfectly.
Finally, just like when you learn to drive a car or dance the mambo, context is everything when training your dog. So that they can STAY when it matters most, include a variety of locations, distractions and friends in your practice sessions, always helping your dog succeed by starting with easier steps before progressing to the harder levels. And just like that, you’ll have that fabulous family photo, complete with your very good dog… and Gramma’s outfit will be paw-print free as well!

In giving the steps to train dogs to do stay (this is an excellent explanation and well-thought out approach), the writer of this article (blog) says to do this while standing NEXT TO your dog, and yet it seems to me that many dog owners, and the trainers they work with, want to start teaching the STAY standing IN FRONT OF their pup; the advantage, I think, is that this way they’re in FULL VIEW of (by)their dog (the dog can see them directly) while they’re trying to get the behavior, and also HAVE a full view of their dog. SO I’m just curious, is there any specific purpose you have in starting on the dog’s side, or is it just a preferred mode of doing this exercise?
Hi Nina,
What a great question and I appreciate your eye for details! The idea is being near your dog, close by them, to build duration first. I used the term “next to” very loosely. It can be in front of the dog or by their side. Early in training, I like to mix up where I’m standing – sometimes on one side, sometimes the other, sometimes right in front. The dog can easily swivel their head to see me. Switching up your starting position from the very beginning can make generalizing the cue and behavior easier in the long run. That said, some dogs need you to be very precise and still because they have a hard time settling. For those wiggly pups, adding the step of being consistent in your position in the beginning can really help. Keep on training! Thanks for your comment.